TECHNIQUE
How to Rig an Inline Underwater Camera for Trolling and Casting
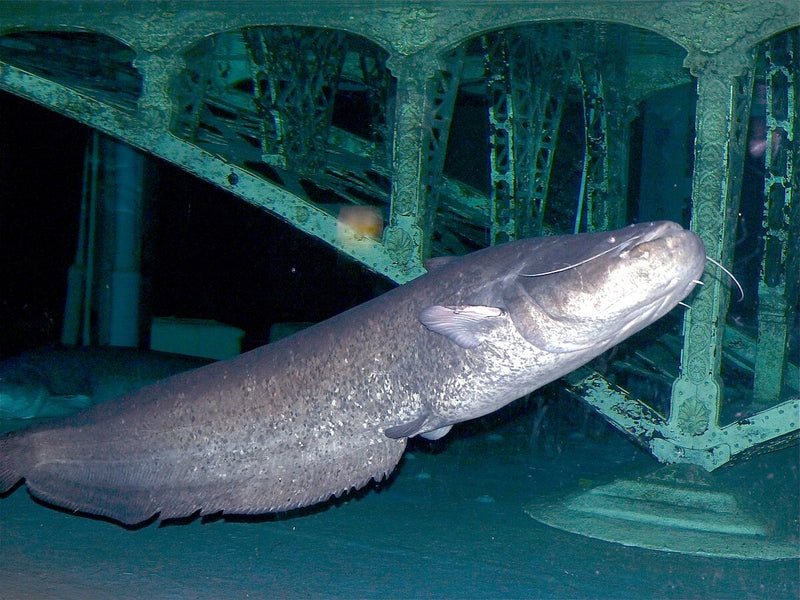
You have an underwater camera in your hands. The box is open, the app is installed, and now you are staring at 85 grams of aluminium and glass wondering how exactly this thing is supposed to go on your line without ruining your fishing.
KEY TAKEAWAY
Rigging an inline camera is straightforward once you understand leader length, weight placement, and the stabilizer fin orientation. The biggest mistake beginners make is using too short a leader, which puts the camera too close to the lure.
IN THIS ARTICLE
Fair question. A badly rigged camera spins, tangles, spooks fish, and produces footage that looks like the inside of a washing machine. A well-rigged camera sits stable in the water column, records clear footage, and barely affects your presentation.
This guide covers exactly how to rig an inline camera -- specifically the CanFish CamX, which at 85.3 g and 31 mm diameter is built for line-mounting -- for trolling, casting, and float fishing. Every step assumes you are holding the camera for the first time.
Before You Start: What You Need
Gather these before you head to the water:
- Underwater camera (the CamX has attachment points at both ends of the cylindrical body)
- Fluorocarbon leader material -- 0.35 to 0.50 mm for predator fishing, 0.25 to 0.30 mm for lighter species
- Barrel swivels -- size 4 to 6 (rated 15 kg+). Non-negotiable. These prevent line twist from destroying your footage and your day
- Snap links or snap swivels -- for quick lure changes
- Split shot or drilled bullet weights -- for adjusting sink rate
- Crimps or reliable knots -- Palomar or improved clinch are both fine
- Sharp scissors or line cutters
Understanding the Inline Camera Position
An inline camera sits between your main line and your lure or bait. The camera looks forward, down the leader, toward whatever is at the business end of your rig.
The key principle: the camera must not spin. If it rotates freely on its axis, every frame of footage is a blur, and your line ends up a twisted mess within five retrieves.
Three things prevent spin:
- Barrel swivels above and below the camera
- Proper leader length below the camera (too short = the lure's wobble transfers; too long = unnecessary drag)
- Correct weight placement to keep the camera oriented lens-down or lens-forward
Step-by-Step: The Basic Inline Rig
This is the universal starting point. It works for trolling, casting, and float fishing with minor adjustments covered in the sections that follow.
Step 1: Tie Your Upper Swivel to the Main Line
Cut your main line where you want to insert the camera. Tie a barrel swivel (size 4-6) to the end of your main line using a Palomar knot or improved clinch knot.
Palomar knot recap: Double 15 cm of line through the swivel eye, tie an overhand knot with the doubled line, pass the swivel through the loop, moisten, pull tight. Trim the tag end to 3 mm.
This upper swivel is the most important anti-twist component in your rig. Do not skip it even if you think your lure does not spin. On camera rigs, everything spins more than you expect.
Step 2: Attach the Upper Leader to the Camera
Cut a piece of fluorocarbon leader, 15 to 20 cm long. Tie one end to the free eye of your upper barrel swivel.
Tie the other end to the top attachment point of your camera (the end farthest from the lens). The CamX has a stainless steel eye at each end -- use your Palomar knot here too.
This short upper leader gives the camera a small buffer from your main line. It absorbs shock during casting and keeps the camera from banging directly against your rod tip when you reel in.
Step 3: Attach the Lower Leader
Tie another barrel swivel to the bottom attachment point of the camera (the lens end). This is your lower swivel.
Now tie your lower leader to the free eye of this swivel. Length depends on your method:
- Trolling: 60 to 80 cm. The camera needs distance from the lure to capture a wide field of view. With the CamX's 136-degree lens, 60 cm puts a standard-sized pike lure fully in frame.
- Casting: 40 to 60 cm. Shorter keeps the rig manageable for casting, and you want the lure visible but not tiny in frame.
- Float fishing: 30 to 50 cm. Bait movement is slower, and the camera is often stationary or near-stationary, so shorter works.
Step 4: Add Weight for Stability
The camera itself weighs 85.3 g, which provides some natural ballast. But depending on your setup, you may need additional weight to:
- Keep the camera oriented correctly (lens facing forward or downward)
- Reach the desired depth
- Counteract buoyancy if you are using the buoyancy ring accessory
Do not add weight below the camera unless you specifically want the lens pointing upward (for filming surface takes, for instance). Weight below the camera flips it lens-up.
Step 5: Test in Shallow Water First
Before you commit to a session, test your rig in clear shallow water -- a dock, a boat launch, a clear stretch of bank.
Lower the rig to 1 to 2 metres, connect the CamX app on your phone (5 GHz WiFi for better live preview), and check:
- Is the camera stable, or is it rotating?
- Is the lens pointing where you want?
- Is the lure in frame?
- Is the leader visible (too thick or too stiff)?
Rig Variations by Method
Trolling Rig
Trolling is the easiest method for an inline camera because the constant forward motion keeps the rig taut and the camera stable.
Key adjustments:
- Leader length below camera: 60 to 80 cm minimum. At trolling speeds (2 to 5 km/h), the camera needs distance to keep the lure in frame without it being a small dot.
- Trolling speed matters: Below 2 km/h, the camera may start to wobble. Above 5 km/h, water pressure on the camera body can cause spinning. The sweet spot for stable footage is 2.5 to 4 km/h.
- Lure selection: Lures with aggressive wobble (deep-diving crankbaits, large spoons) create more vibration that transfers up the leader to the camera. Use a slightly longer lower leader (80 cm) with wobbly lures.
- Downrigger compatibility: If you troll with a downrigger, clip the camera rig to the downrigger cable using a release clip attached to the upper swivel. The camera then sits in front of the lure at the correct depth without you needing additional weight.
| Speed | Camera stability | Notes | |-|--|-| | 1-2 km/h | Moderate | Camera may drift; add 5-10 g weight above camera | | 2.5-4 km/h | Excellent | Ideal range for stable footage | | 4-5 km/h | Good | Slight vibration, still usable footage | | 5+ km/h | Poor | Water pressure causes spin; shorten upper leader |
Casting Rig
Casting with an inline camera requires more thought because the rig goes through violent acceleration on the cast and constant direction changes on the retrieve.
Key adjustments:
- Leader length below camera: 40 to 60 cm. Longer leaders tangle on the cast.
- Upper leader: Keep it short -- 10 to 15 cm maximum. This reduces the pendulum effect during casting.
- Casting technique: Smooth, sidearm or underhand lob casts. Overhead power casts whip the camera and leader into a tangle. Treat it like casting a fragile bait -- controlled and deliberate.
- Lure weight: Your lure needs to be heavy enough to pull the entire rig (lure + camera + leaders + swivels). A 15 g jig head or 20 g spoon is the minimum practical weight for a comfortable cast with the CamX attached.
- Retrieve speed: Steady retrieve works best. Stop-and-go retrieves cause the camera to swing forward on each pause, producing footage of the lure rushing toward the lens and then away. If you must jig, accept that the footage will have some movement.
Float Rig (Bobber Rig)
Float fishing with an inline camera is perhaps the most rewarding setup because the camera is near-stationary, producing calm, steady footage of bait and approaching fish.
Key adjustments:
- Camera position: Place the camera above your bait, not below. The rig runs: main line > float > upper swivel > upper leader > camera > lower swivel > lower leader > hook and bait.
- Lower leader length: 30 to 50 cm. The bait should be clearly visible in the camera's 136-degree field of view.
- Float size: Your float must support the weight of the camera (85.3 g) plus your bait plus any split shot. A float rated for 80 to 120 g total is usually right. A standard 20 g pike float will sink with the camera attached -- you need a bigger one.
- Depth setting: Set your float stop so the camera hangs at the depth you want to observe. In weedy water, keep the camera 30 to 50 cm above the weed tops for a clear field of view.
- Current: In rivers or where there is drift, the camera will tilt with the current. A small amount of tilt is fine -- it means the lens is pointing slightly downstream, which is usually where the fish approach from anyway.
Common Mistakes and How to Fix Them
The Camera Spins Non-Stop
Cause: Missing barrel swivels, or swivels that are corroded and no longer rotate freely.
Fix: Replace both swivels with fresh, quality ball-bearing swivels (not just barrel swivels) if the problem persists. Cheap brass swivels seize up after one session in saltwater.
Also check your lure -- some spinners and spoons create massive line twist that overwhelms any swivel. Attach a keel weight or use a non-spinning lure.
Footage Is All Murky Green or Brown
Cause: The camera is too close to the bottom, and silt kicks up into the frame on every movement. Or, the lens is pointing straight down into mud.
Fix: Add a small piece of closed-cell foam to the upper leader to give the camera slight positive buoyancy. This tilts it lens-forward rather than lens-down. Also, lengthen the lower leader so the lure's bottom contact does not stir up silt directly in front of the lens.
The Rig Tangles on Every Cast
Cause: Leader too long, cast too aggressive, or no swivels.
Fix: Shorten your lower leader to 40 cm maximum for casting. Switch to a controlled sidearm lob. Make sure both swivels are in place. If it still tangles, try a stiffer leader material -- stiff fluorocarbon resists tangling better than limp mono.
Fish Are Spooked by the Camera
Cause: The camera is too close to the bait or lure, or the LED illumination is on in clear water.
Fix: Lengthen the lower leader to 60 to 80 cm. Turn off the green LEDs in the CanFish app during daylight and in clear water -- the illumination is designed for low-light conditions, not midday in a clear lake. The camera body itself (31 mm diameter, dark colour) is smaller than most pike lures. Fish generally ignore it once it has been in the water for a few minutes.
One Side of the Footage Is Always Dark
Cause: The camera is mounted at an angle, or the upper leader is too long, causing the camera to hang tilted.
Fix: Adjust weight placement. If one side is dark and the other bright, the camera is tilted toward the dark side. Move your split shot to the opposite side of the upper leader, or shorten the upper leader to reduce swing.
WiFi Disconnects When the Camera Goes Under
Cause: This is physics, not a fault. WiFi signals (2.4 GHz and 5 GHz) do not penetrate water. The CamX's 50 m WiFi range is above-water only.
Fix: There is no fix because this is how radio waves work. Use the live WiFi preview to aim and test your rig in shallow water. Once the camera is at depth, it records to its internal 16 GB storage (roughly 8 hours of footage at 1080p). Review the footage after you retrieve the camera and reconnect to WiFi. The CanFish app lets you download, trim, and replay on your phone.
Maintenance After Every Session
An inline rig puts your camera through more physical stress than a stationary drop rig. After each session:
- Rinse the camera in fresh water, especially after saltwater use. The CamX is rated to 200 m and handles salt, but salt crystals in the attachment eyes will corrode over time.
- Inspect your swivels. Spin them with your fingers. If they do not rotate freely, replace them.
- Check your knots. Fluorocarbon weakens at knot points after repeated casting stress. Re-tie if in doubt.
- Clean the lens. A microfibre cloth and a drop of water. Do not use solvents.
- Charge the camera. The CamX gets 138 minutes of recording with WiFi off. Wireless charging on the included dock takes about 3.5 hours. Top it up after every session so you are always ready.
Quick Reference: Rig Specs by Method
| Parameter | Trolling | Casting | Float | |--|-||-| | Upper leader | 15-20 cm | 10-15 cm | 15-20 cm | | Lower leader | 60-80 cm | 40-60 cm | 30-50 cm | | Swivels | 2x barrel, size 4-6 | 2x barrel, size 4-6 | 2x barrel, size 4-6 | | Extra weight | Optional, 5-10 g above camera | Usually none needed (lure weight sufficient) | Float must support 80-120 g total | | Min lure weight | 10 g | 15-20 g | N/A (bait) | | Camera orientation | Lens forward | Lens forward | Lens downward | | WiFi preview useful? | Yes, at surface before trolling | Yes, for testing | Yes, if float is within 50 m |
A Note on Line Strength
The CamX weighs 85.3 g. Your main line and leaders must support this weight plus your lure plus the force of casting and fighting fish. For most predator fishing in Europe, 0.30 mm fluorocarbon leader (roughly 6 to 8 kg breaking strain) is the minimum with the camera attached. For pike, use 0.40 to 0.50 mm or a short wire trace between the lower swivel and the lure -- pike teeth will cut fluorocarbon regardless of diameter.
If you use braided main line (which most European predator anglers do), the braid-to-swivel connection is your weakest point. Use a reliable knot -- the Palomar is hard to beat for braid-to-swivel.
Final Thought
The first time you rig an inline camera feels fiddly. The second time, it takes three minutes. By the fifth session, you will tie it without thinking about it, the same way you tie a leader now.
The footage you get back -- a pike ghosting in behind your lure, a perch inspecting your jig from below, a zander materialising out of murky green nothing -- makes every minute of rigging worth it. You will learn more about fish behaviour from one afternoon of camera footage than from a year of staring at your rod tip.
RELATED READING
Further reading: Fishing knots guide (Animated Knots) · Trolling techniques (Wikipedia)
Frequently Asked Questions
How long should the leader be between camera and lure?
30-50cm for casting, 50-80cm for trolling. Too short and the camera interferes with lure action. Too long and the camera misses the strike zone.
Does the camera affect lure action when rigged inline?
The CamX's 85g weight and stabilizer fin design minimise drag. On slow retrieves and trolling, lure action is virtually unaffected. On fast jerk baits, there may be slight dampening.
Can I use a snap swivel to attach the camera?
Yes - a quality ball-bearing swivel between the mainline and the camera leader prevents line twist, which is the most common problem with inline camera rigs.
ABOUT THE AUTHOR
Written by the Fisho Team - a small crew of anglers based in Riga, Latvia. We test, review, and stock the gear we actually use on the water.
Disclosure: Fisho.eu is an authorized European distributor of the CanFish CamX. Some links in this article point to our product page. We only recommend gear we've personally tested.
The CanFish CamX weighs 85.3 g, records 1080p at 136 degrees, and is built for inline rigging. Shop the CanFish CamX at Fisho.eu --> -- EUR 189, free EU shipping.