TECHNIQUE
Does an Underwater Camera Work in Murky Water? We Tested It on a Baltic Lake
This is the question. Not "what resolution does it shoot in?" or "how deep can it go?" The question European anglers actually ask before buying an underwater camera is simpler and more honest:
KEY TAKEAWAY
Underwater cameras do work in murky European water - but expectations matter. A Sony STARVIS sensor with f/2.0 aperture gives usable footage in visibility as low as 1-2 metres, which covers most Baltic and Central European conditions.
IN THIS ARTICLE
- Why European Water Looks the Way It Does
- The Test: Three Water Conditions, Honest Results
- The Honest Visibility Chart
- 7 Tips for Getting Better Footage in Murky Water
- Why Sensor Quality Matters More in Murky Water
- When NOT to Use an Underwater Camera
- What European Anglers Are Actually Seeing
- The Bottom Line
"My lake looks like tea. Will I see anything?"
Fair question. Most underwater camera marketing uses footage shot in crystal-clear water - Caribbean snorkelling conditions, American reservoirs with 10+ metres of visibility, aquariums. That's not what we fish.
European inland waters are tannic. Peat-stained. Algae-rich in summer. Sediment-loaded after rain. The Baltic feeder lakes we fish in Latvia rarely offer more than 2-3 metres of visibility, and after a good rain it drops to under a metre.
So we took a CanFish CamX into three different bodies of water across a weekend to give you an honest answer. No cherry-picked footage, no "best conditions" disclaimers buried in fine print. Here's what we found.
Why European Water Looks the Way It Does
Before the test results, a quick primer on what you're dealing with. European water clarity is affected by three main factors, and understanding them helps you predict what your camera will show.
Tannins (the "tea" colour)
Decaying plant matter - leaves, peat, fallen wood - releases tannic acid into the water. This is why so many Scandinavian, Baltic, Irish, and Scottish lakes have that amber-brown tint. It's not pollution; it's natural chemistry. Tannic water absorbs light, especially in the red end of the spectrum, giving everything a greenish-brown cast.
Camera impact: Tannins reduce visibility distance but don't scatter light the way particles do. You'll see a colour cast on your footage, and distance drops, but objects within range can still be surprisingly sharp.
Suspended particles (turbidity)
Clay, silt, algae cells, and organic matter floating in the water column. This is what makes water look "cloudy" rather than just "coloured." Rivers after rain, shallow lakes with soft bottoms disturbed by wind, and eutrophic (nutrient-rich) lakes with algae blooms all have high turbidity.
Camera impact: Particles scatter light from the camera's LEDs right back into the lens, creating a foggy glow effect - similar to driving with high beams in fog. This is the hardest condition for any camera. Particles close to the lens light up brightly while everything beyond fades to murk.
Algae blooms (seasonal)
Summer algae growth can turn clear water green within days. Cyanobacteria blooms in warm, nutrient-rich lakes are a growing problem across Europe - they turn the water pea-soup green and can drop visibility to centimetres.
Camera impact: Dense algae is the camera killer. A green soup blocks light completely. Light algae tinting is manageable. Heavy bloom is not.
The Test: Three Water Conditions, Honest Results
We used a CanFish CamX (Sony STARVIS 2MP sensor, f/2.0 aperture, 136° FOV, dual green LEDs) for all three tests. We chose this camera because it's what we sell and what we know - but the optical principles apply to any camera. A better sensor and wider aperture will always outperform a worse one in the same conditions.
Test 1: Moderately Tannic Lake - ~2 Metre Visibility
Location: A typical Latvian forest lake, mid-spring. Water has the classic amber tint from pine and birch leaf tannins. Secchi disc reading approximately 2 metres. [VERIFY: Secchi disc is white disc lowered until no longer visible - standard measure of water clarity. 2 metres is typical for Baltic forest lakes in spring.]
Depth tested: 1-4 metres (littoral zone, weed beds, sandy-gravel transition).
Results:
At 1-2 metres depth in open water during midday (good ambient light):
- Clear, usable footage out to about 1.5 metres from the camera
- Colours muted but recognisable - you could distinguish perch flanks from the background, see weed species, identify substrate type
- Fish visible and identifiable at up to 1.5 metres. Beyond that, shapes but no species ID
- Bottom detail excellent within 1 metre: gravel, plant stems, a crayfish moving across sand - all clear
- LEDs engaged automatically. Visible range dropped to about 1 metre
- The green LEDs produced a natural-looking illumination that didn't seem to spook the perch school we found
- Bottom detail still good within 0.5-1 metre
- A pike sitting motionless on the bottom was visible at approximately 1.2 metres - recognisable shape and markings
Test 2: Post-Rain River Tributary - ~0.5 Metre Visibility
Location: A small river feeding into the lake, tested the morning after 18mm of overnight rain. Visibly turbid - coffee-with-milk colour. Secchi disc barely 0.5 metres.
Depth tested: 1-2 metres (it's a shallow river, 2 metres max in the pools).
Results:
This was the tough test. High suspended sediment from rain runoff.
- At any depth, the LED backscatter was significant. The green LEDs illuminated particles between the camera and the subject, creating a foggy curtain effect
- With LEDs off (relying on ambient light only), footage was better in the top metre where daylight penetrated - but dark and nearly useless below 1.5 metres
- Identifiable range: approximately 30-50 cm. You could see a large object (a submerged branch, a decent-sized fish) within half a metre, but detail dropped off fast
- We did capture a chub investigating the camera at roughly 40 cm distance - close enough for a clear frame, but only because the fish came to us
- Bottom substrate visible only when the camera was resting directly on it
Tip that helped: Turning off the LEDs in shallow water (under 1.5m during daylight) and relying on ambient light reduced backscatter significantly. The CamX app lets you control LED brightness - we found 0% or 25% was better than full power in turbid conditions.
Test 3: Clear-ish Lake Basin - ~4 Metre Visibility
Location: The deeper basin of the same forest lake, mid-afternoon with sun. Secchi disc approximately 4 metres. This is about as clear as Latvian lowland lakes get in spring.
Depth tested: 2-8 metres.
Results:
This is where the Sony STARVIS sensor showed its value.
- At 2-4 metres depth (within Secchi range): excellent footage. Colours accurate, detail sharp, fish identifiable at 2+ metres. A school of roach was visible and countable. Perch markings clearly distinguishable. Weed beds looked like a nature documentary compared to the river test.
- At 6-8 metres depth (below where ambient light reaches well): LEDs provided clear illumination within approximately 1.5 metres. The green light cast is noticeable but doesn't distort colours badly. A resting pike at 7 metres depth was captured clearly at approximately 1 metre distance.
- The 136° wide-angle lens meant even close subjects were captured with full context - you saw the fish AND the surrounding structure, not a zoomed-in tunnel view.
The Honest Visibility Chart
Based on our testing and general optical principles, here's what to realistically expect:
| Water Visibility (Secchi Depth) | What You'll See | Camera Useful? | |||| | 4m+ (clear lakes, mountain streams, spring-fed waters) | Excellent footage. Fish ID at 2-3m. Full colour. Nature documentary quality in good light. | Absolutely yes | | 2-4m (typical northern EU forest lakes, moderate tannins) | Good footage. Fish ID at 1-1.5m. Colour muted but functional. Bottom detail clear within 1m. | Yes - this is the sweet spot for European use | | 1-2m (moderate turbidity, light algae, tannic rivers) | Usable footage. Fish visible within 0.5-1m. Shapes and behaviour observable. Colours washed. | Yes, with adjusted expectations | | 0.5-1m (post-rain, moderate algae bloom, disturbed sediment) | Close-range only. Fish ID within 30-50cm. LED backscatter an issue. Background is murk. | Marginal - works for close observation, not scouting | | Under 0.5m (heavy rain runoff, thick algae bloom, stirred silt) | Near-zero useful footage. Can't see past the backscatter. | No - leave the camera home, use sonar |
7 Tips for Getting Better Footage in Murky Water
Years of testing in Baltic conditions have taught us some tricks. These apply to any underwater camera, not just the CamX.
1. Reduce or Kill the LEDs in Shallow Water
The number one mistake. People crank the lights to maximum in murky water, thinking more light = better visibility. The opposite is true when particles are present. More light = more backscatter = worse image.
In water under 2 metres during daylight, try turning LEDs off completely. The ambient light filtering through may give you a better image than the LEDs will. If you need the LEDs (deep water, dusk, heavy shade), use the minimum brightness that lights your subject.
2. Fish the Clear Days
Obvious but worth stating: the day after three days of calm, sunny weather will give you dramatically better water clarity than the morning after a storm. Sediment settles. Algae distributes. Tannins don't go away, but turbidity drops.
If you're planning a session specifically to use the camera for scouting, pick your weather window.
3. Go Deeper (Sometimes)
In lakes with surface algae or wind-stirred turbidity, the water 3-4 metres down is often significantly clearer than the top metre. The thermocline acts as a boundary - warmer turbid water sits above, cooler clearer water below.
Drop the camera below the murky layer and you may be surprised. We've seen 2+ metre visibility at 5 metres depth in lakes that looked impenetrable from the surface.
4. Let It Settle
When you lower a camera to the bottom, you disturb sediment. The first 30-60 seconds of footage will be a cloud of silt you created. Wait. Let the camera sit. The current will clear the disturbed sediment, and your footage quality improves dramatically after a minute of patience.
5. Avoid Stirred-Up Shallows
Wind pushes waves that stir bottom sediment in shallow water. If the wind is pushing onto your bank, the margins will be the murkiest water on the lake. The sheltered lee shore will be clearer. Simple, but it makes a measurable difference.
6. Position the Camera Correctly
Point the camera horizontally or slightly upward rather than straight down into silt. A horizontal view gives you the most visible range because you're looking through the clearest layer of water (ambient light enters from above, illuminating a horizontal plane better than a vertical one).
If you're scouting the bottom, get the camera close to it (30-50 cm above) rather than looking down from 2 metres up.
7. Use the Wide Angle
The CamX's 136° FOV is an advantage in murky water specifically because it captures more of the close-range environment. In clear water, you might wish for a tighter zoom on a distant fish. In murky water, everything you can see is close - and a wider lens captures more of it.
Why Sensor Quality Matters More in Murky Water
This is worth explaining because it's the least understood spec.
In clear water, almost any camera sensor produces acceptable images - there's enough light and contrast for even a basic CMOS chip to resolve detail. The differences between a cheap sensor and a good one are visible but not dramatic.
In murky water, the gap becomes enormous.
Aperture (f-number): The f/2.0 aperture on the CamX lets in twice the light of an f/2.8 lens and four times the light of an f/4 lens. In murky water, you need every photon you can get. The wider the aperture, the more the camera can resolve in poor conditions.
Sensor sensitivity (ISO): The Sony STARVIS sensor line was designed for security cameras - applications where the camera needs to produce usable images at dawn, dusk, and under streetlights. That low-light optimisation directly transfers to murky underwater conditions. The CamX's ISO range of 100-6400 means the sensor can amplify weak signals from low-visibility water.
Noise handling: Cheap sensors produce heavy grain (noise) when they amplify low-light signals. The STARVIS architecture handles noise significantly better - you get a usable image at ISO 3200 where a budget sensor would give you a grainy mess.
This is why a €100 camera and a camera with a proper sensor produce dramatically different results in the same murky water. In clear water, you might not notice the difference. In European conditions, you will.
When NOT to Use an Underwater Camera
Honesty time. There are conditions where no camera - regardless of price or sensor - will produce useful footage:
- Heavy cyanobacteria bloom. If the water is bright green and opaque, visibility is measured in centimetres. Don't bother. (Also: don't swim in it. It's toxic.)
- Immediately after major flooding. Rivers and lakes carrying heavy sediment loads from rain events can have near-zero visibility for days. Wait for it to settle.
- Heavily stirred shallow flats. Bream rolling on a silty flat at 1 metre depth in a wind? That water is chocolate milk. The camera goes back in the bag.
- Canal boat traffic zones. Narrowboat traffic in UK/Dutch/German canals stirs constant sediment. The window between boats passing is often too short for visibility to recover.
What European Anglers Are Actually Seeing
We hear from anglers across Europe, and the feedback consistently matches our testing:
Scandinavian anglers (Sweden, Finland, Norway): Generally positive - Scandinavian lakes tend toward clear or moderately tannic. Ice fishing footage is particularly good because winter water is typically at its clearest (algae die-off, settled sediment, no boat traffic).
Baltic anglers (Latvia, Lithuania, Estonia): Mixed conditions. Forest lakes with moderate tannins give good results. Coastal lagoons and shallow bays are more challenging. Best results in autumn and winter.
German and Central European anglers: Varies enormously. Alpine and sub-alpine lakes (Bavaria, Austria, Switzerland) are often very clear - excellent camera conditions. Lowland carp lakes and rivers are murkier and more challenging.
UK and Irish anglers: Canal and river fishing tends toward the difficult end - turbid, silty, frequently disturbed. Stillwater trout fisheries and clear reservoirs are better. Irish loughs vary from excellent (limestone) to challenging (peaty).
Dutch and Belgian anglers: Polder waters are often the toughest in Europe - shallow, nutrient-rich, wind-exposed, constantly stirred. Bigger lakes and gravel pits offer better conditions.
The pattern is clear: the camera works in most European freshwater conditions for most of the year. It struggles in the specific scenarios listed above. Knowing your water helps you set expectations.
The Bottom Line
Will an underwater camera work in your murky European lake? Probably yes - with realistic expectations.
If your water has 1-2 metres of visibility (which covers the majority of European freshwater during the majority of the year), you'll see fish, identify species, observe behaviour, and scout bottom structure within about a metre of the camera. That's enough to make better decisions about where to place your bait, what species are present, and whether your swim is worth the session.
If your water has 3+ metres of visibility, you'll get footage you're genuinely excited to watch.
If your water is under 0.5 metres visibility, save the camera for another day.
The key is understanding that an underwater camera in European waters isn't about creating Jacques Cousteau documentaries. It's about seeing the one to two metres around your hook, bait, or swim that have always been invisible to you. And that alone changes how you fish.
RELATED READING
Further reading: Secchi disk water clarity measurement · Sony STARVIS sensor technology
Frequently Asked Questions
Can underwater cameras see in peat-stained water?
Yes, but visibility is reduced. In typical Baltic tannic water with 2-3m natural visibility, a Sony STARVIS sensor camera will give usable footage within 1-2 metres of the lens. Green LED illumination helps in the darkest conditions.
Do green LEDs work better than white LEDs in murky water?
Green light penetrates tannic and algae-rich water slightly better than white light and causes less backscatter from suspended particles. The CanFish CamX uses green LEDs specifically for this reason.
Is there any point using an underwater camera if visibility is under 1 metre?
Below about 0.5m visibility, footage becomes very limited. However, the camera still captures motion-triggered clips of fish that come close to investigate your bait - which can be surprisingly informative.
ABOUT THE AUTHOR
Written by the Fisho Team - a small crew of anglers based in Riga, Latvia. We test, review, and stock the gear we actually use on the water.
Disclosure: Fisho.eu is an authorized European distributor of the CanFish CamX. Some links in this article point to our product page. We only recommend gear we've personally tested.
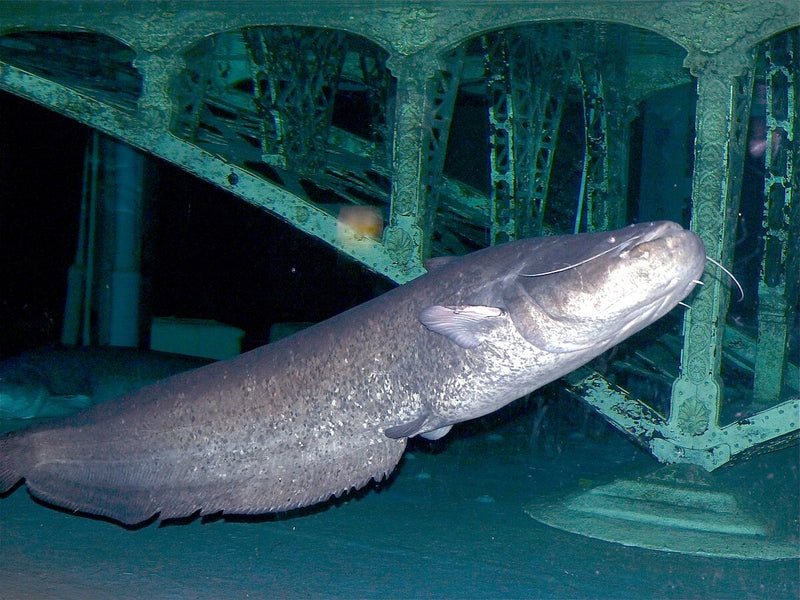
Want to see what 136° and Sony STARVIS look like in real water? Check the CanFish CamX →